Apparat
From FDT Documentation
With FDT 4.4, we've began to support Apparat. Apparat is a powerful framework to optimize ABC, SWC and SWF files. It's open source and looks to push the boundaries of ways for Flash developers to enhance their workflows and applications.
Contents |
Source Files
Demo files are offline until they are updated.
Adding Apparat To A Project
When you want a project to enable Apparat, you'll have to enable it. Once you do that, all existing and new launchers associated with that project will automatically have Apparat integrated into the build process.
To begin, right click on a project and select Properties.
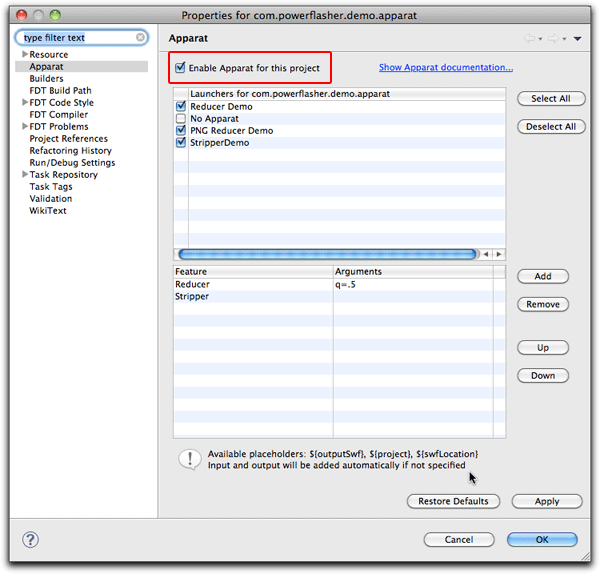
Next, find Apparat within the project's Properties panel and click 'Enable Apparat for this project'. This will enable Apparat for the existing launchers and any new ones created.
Configuring Apparat
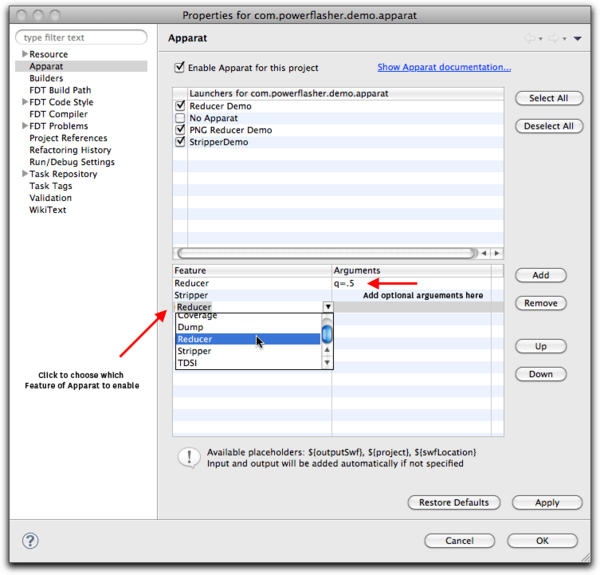
Adding and removing Apparat's features is simple, as can be seen in the above screen shot. By default, FDT will pass in your compiled SWF to Apparat for processing. Since no specific output is defined, Apparat will overwrite the supplied SWF with the optimized one.
This GUI also enables you to add additional arguments. Learn more about Using Apparat's Arguments with FDT.
Using Reducer
Apparat's reducer is a powerful feature that is used to compress PNGs and bytecode. From Apparat's README:
You can use reducer for advanced compression of your SWF files. Reducer tries to compress embedded PNG graphics. You can leverage this option also with the ActionScript compiler by specifing "[Embed(src=..., compress=true)]". However to speedup compilation you can ignore the compress parameter and let Reducer do the job since it makes use of multicore architectures.
Simple Reducer Example
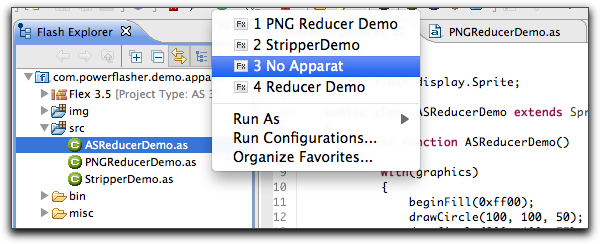
If you're using the provided Apparat Example Project, running the 'No Apparat' launch configuration.
FDT will then create a simple .SWF that is 740 bytes.
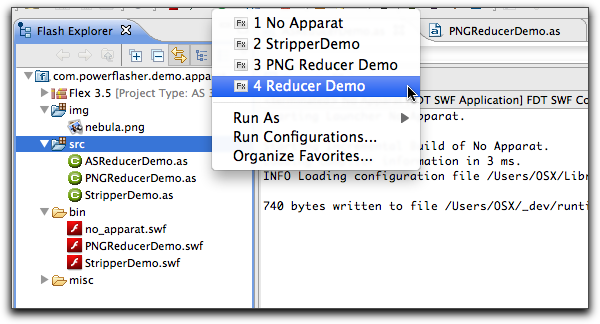
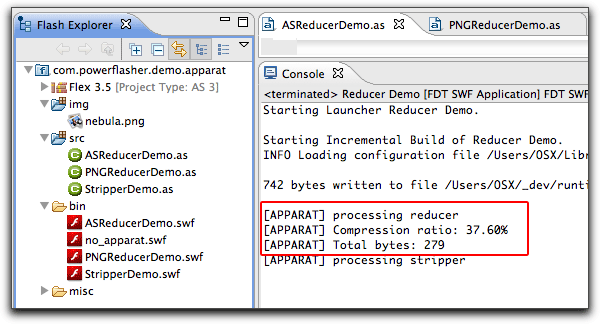
Next, choose and run the 'Reducer Demo' configuration.
FDT will then create the .SWF that is 740 bytes, then use Apparat's Reducer to shrink it down by 37% to 279 bytes.
PNG Compression With Reducer
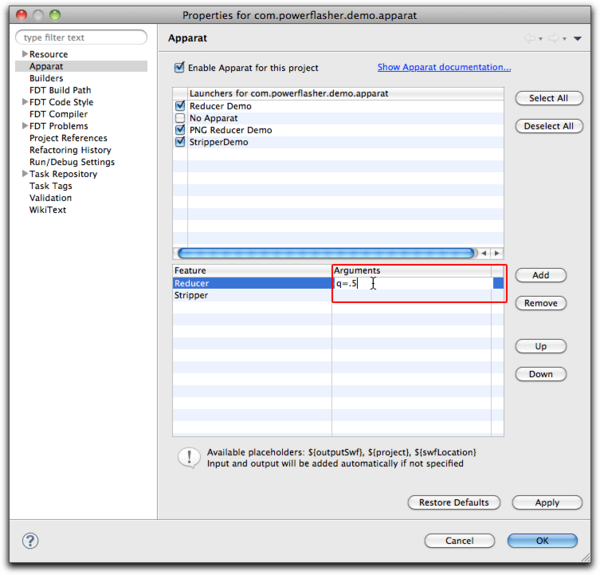
Opening up the Apparat panel within your project's Properties View, add an additional argument to Reducer 'q=.5'. This will adjust Apparat's JPEG compression level (see Apparat's README).
- Remember, we only need to pass the argument as 'q=.5' instead of the command line version '-q .5'
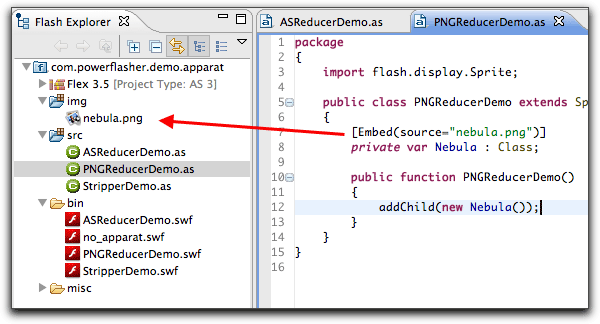
Back in Editor view, open the file PNGReducerDemo.as and notice that this is embedding an image.
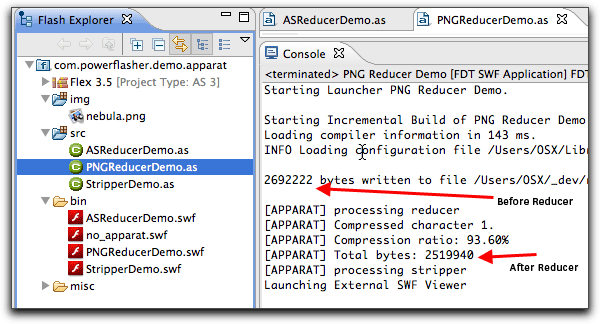
Lastly, execute the 'PNG Reducer Demo' launcher:
After running, you'll be able to see the compression level of Apparat:
Using With Reducer On Other Files
Let's add an additional .SWF to our launcher for Apparat to optimize. We'll learn how to:
- Add more Apparat commands
- Use arguments with Apparat
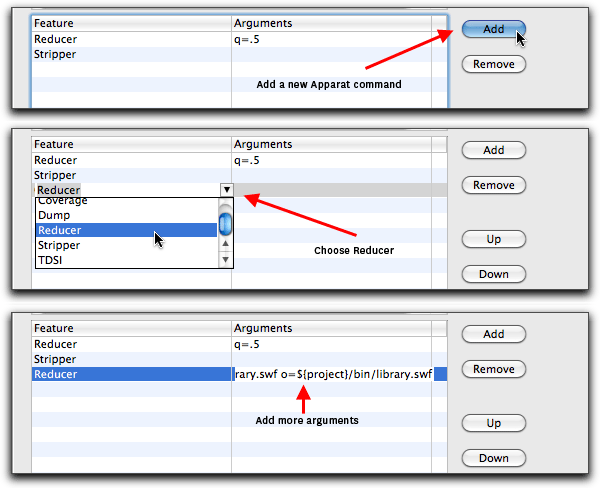
The example files are included in the demo, but you'll have to add the commands to Apparat yourself.
Being by opening your project's Apparat configuration and following these steps:
Here are the arguments being added to apparat:
i=${project}/misc/library.swf o=${project}/bin/library.swf
Learn more about using Apparat Arguments with FDT below.
Now when these launchers are executed, Apparat will execute the reducer not only on the .SWF we just created, but also on another .SWF as well. It will also save the reduced .SWF into a different directory.
Using Stripper
From Apparat's README:
This tool removes all debug information from a SWF file. It is a type-safe removal keeping side-effects... Stripper removes also all debug related bytecode.
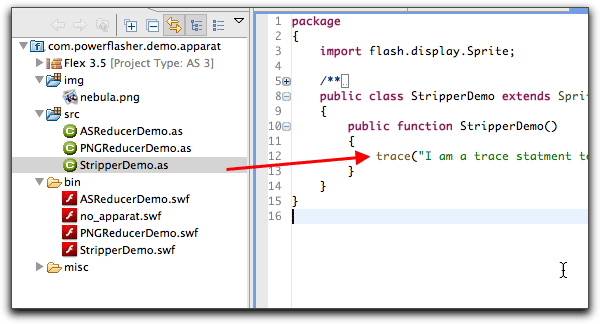
Using Apparat's Stripper with FDT is a great way to easily remove debug info, such as trace statements, from any .SWF.
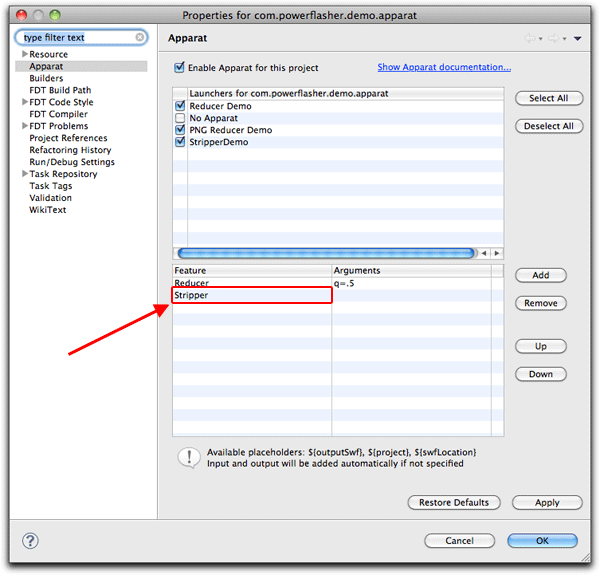
The above example shows a simple trace statement in my code. In the Apparat properties panel, make sure "Stripper" has been enabled:
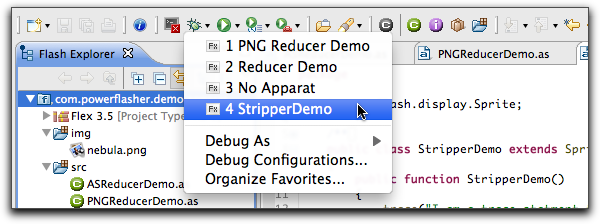
Then run the StripperDemo configuration from the Debug menu:
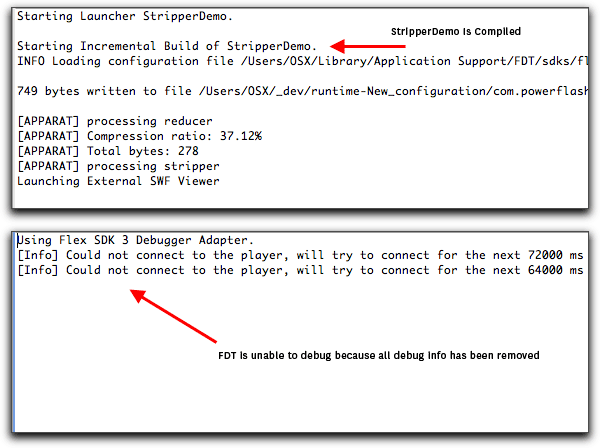
and take note of the console.
Even though FDT has loaded the SWF and initiated a Debug session, it is unable to connect to the SWF. This is because Apparat has removed the .SWF's debug information.
DUMP
Apparat's Dump can be used to generate detailed information about a SWF. This includes UML graph information (via DOT file) and ABC information.
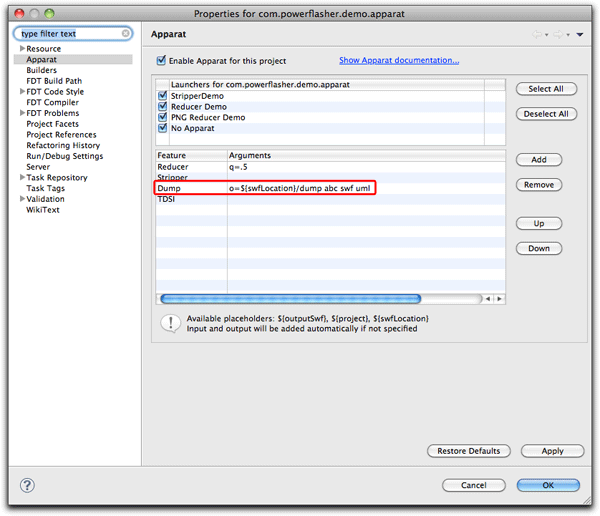
In this example, Dump is implemented with these parameters:
o=${swfLocation}/dump abc swf uml
TDSI
The TDSI tool performs various bytecode transformations. Besides specific transformations the application will always try to do certain peephole optimizations. Most of them will fix problems with older ActionScript compiler versions.
 Learn about using TDSI and it's arguments here
Check out this TDSI example from Joa
Using Apparat's Arguments with FDT
The best place to learn about Apparat's arguments is via Apparat's README that is hosted on Google Code.
Currently, you have to add arguments by hand and when you do, you'll need to omit the dash '-' before each arguments.
If you were to execute Apparat from the command line you would write arguments like this:
reducer -o /Users/OSX/_dev/runtime-New_configuration/appart_test/bin/tdsi.swf
-i /Users/OSX/_dev/runtime-New_configuration/appart_test/bin/tdsi.swf
With FDT, you'll need to omit the dash '-' and you can use additional variables such as ${project} that will automatically add in the location of your project directory.
i=${project}/misc/library.swf o=${project}/bin/library.swf
Additional Arguments
FDT provides additional variables for you to use. The are
- ${project}: This is the root directory of your project.
- ${outputSwf}: The name of the output SWF that is defined in the launcher.
- ${swfLocation}: The location of the output SWF that is being define in the launcher. (this is usually the bin folder)
Using A Custom Installation Of Apparat & Scala
For convenience, FDT ships with both Apparat and Scala. If you would rather use your own installation of Apparat & Scala this can be done via FDT's Apparat Preferences.
Download Apparat
If you choose to not use FDT's built in Apparat installation, you can install Apparat yourself:
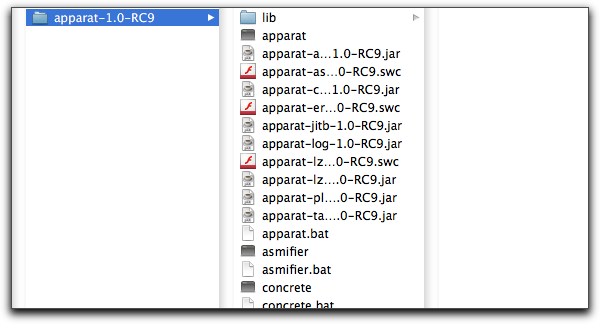
Visit Apparat's Download Page for the latest version of Apparat or follow this download link After downloading them, expand the zip file and place them somewhere handy - you'll be linking to these sources shortly.
Download Scala
If you choose to not use FDT's built in Scala installation, you can install Scala yourself:
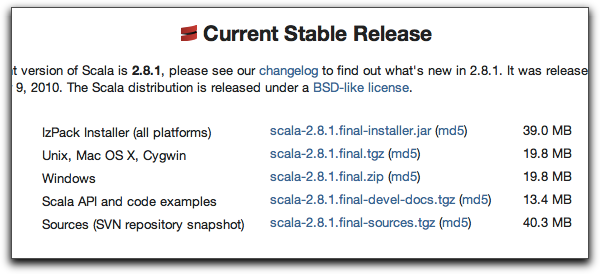
Next just like when Apparat was downloaded, you'll need to download Scala as well. Scala is a general purpose programming language with some powerful features. Apparat is written using Scala so you'll need both.
Windows users can download it here.
OSX and Unix users can download it here.
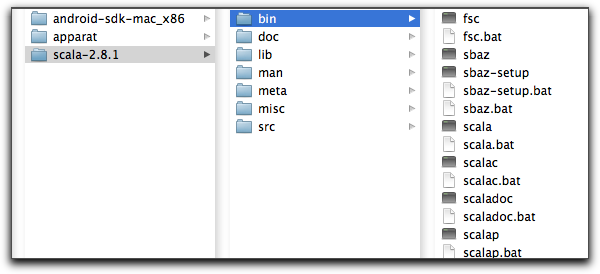
After downloading the archive, expand it.
(If you choose to use FDT's built in Scala & Apparat, you can skip this)
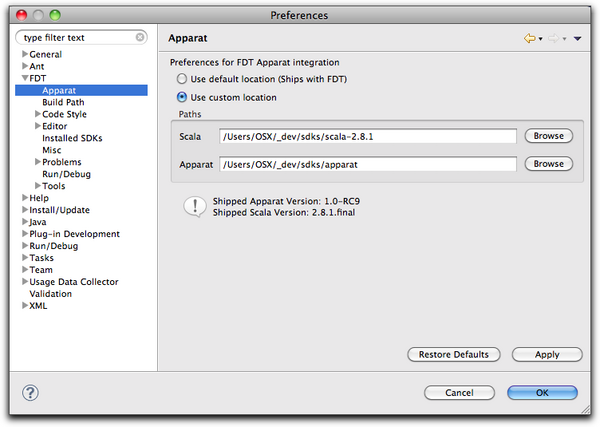
Next thing, you'll need to tell FDT where to find Apparat and Scala. This is done via 'Preferences > FDT > Apparat' preferences view. Simply choose the root directory of each.


