Project Template Syntax
From FDT Documentation
With FDT 4.2, the FDT team greatly expanded project templates and the syntax available in the description.xml.
Contents |
Template Properties
description
Use this tag to add a text description to your template. This will appear in the text area below the template selector. You can even add in variables into your description and update the user about the current selection.
<expressions>
  <expression name="htmlDesc" value="if(${htmlTemplate},
'This HTML wrapper will create a simple HTML page with your SWF embedded in it.',' ')" />
</expressions>
<description>
	This template will create a project named '${projectName}'
	which contains only the basic libraries to develop and compile a
	pure AS3 project.${newline}${htmlDesc}
</description>
- note: Use the ${newline} keyword to create a line break in your descriptions. In the above example, if the users sets true htmlDesc then the additional text will be added, on a new line, to the description.
name
The name of your template as it appears in the new project wizard.
<name>AS3</name>
version
FDT uses this element to keep track of the version for the template in case it is to be updated.
<version>2.0</version>
projectType
Each template needs to have its projectType defined. The project type is what determines which SDK &.SWCs are automatically added to your source path, your runtime, player and compiler arguments.
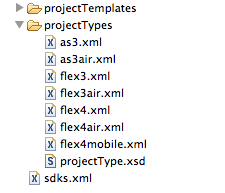
The project types are located in the projectTypes folder within the FDT folder.
Variables
variables
The variables tag is what defines templates in FDT 4.2 and later. When a template implements this element, you'll be able to create UI elements that allow you to customize your project before completion. Your template can only have one variables element. FDT will read the first and ignore any following variables elements.
<variables>
  <primaryGroup label="Template Options"></primaryGroup>
</variables>
primaryGroup
When you create a variables element, you'll need to have a primaryGroup descendant element. Similar to variables, primaryGroup can only appear once inside of a variables element.
<variables>
  <primaryGroup label="Template Options">
    <variable name="addMetaData" label="Add Metadata" default="true"
      type="boolean" />
	<group label="Project Setup">
	  <variable name="addFla" label="Add .fla" default="true"
		type="boolean" />
	  <variable name="htmlTemplate" label="Include HTML Wrapper"
		default="false" type="boolean" />
	</group>
  </primaryGroup>
</variables>
Arguments:
- label : The label description that will appear at the top of the template variables UI section within the New Flash Project Wizard.
- description : An optional description for documentation purposes.
- note: Other arguments, such as 'enableIf', are ignored.
group
Groups are used to organize similar variables together. They are also used to create popup buttons that will open a new window containing more UI elements. Groups can have more groups nested within them.
<variables>
  <primaryGroup label="Options" description="My Template Variables" >
    <group label="Unit Testing">
	  <variable name="addUnitTesting" label="Add Unit Testing"
	    default="false" type="boolean" />

<!-- Create a popupButton that will open these UI variables in a new window -->
		<group label="More..." style="popupButton">
	  	  <variable name="testFolderName" label="Test Folder Name"
			default="test-src" type="string" />
	      <variable name="addExample" label="Add Unit Test Example"
			default="false" type="boolean" />
	      <variable name="addJar" label="Include flexUnitTasks.jar"
					default="false" type="boolean" />
	    </group>
	</group>
  </primaryGroup>
</variables>
Arguments:
- label : The label description that will appear at the top group.
- description : An optional description for documentation purposes.
- enableIf : A boolean that can disable and enable the UI variables within the group.
- style : Use this to set if the group is to be a popup window. Possible values are popupButton and hyperlink.
variable
The most powerful part of project templates are the UI variables you can create. Each variable element you create will represent itself as an interactive UI component (e.g. text input, combo box, radio button). The value of the variable will be evaluated as you change it while configuring your template.
If you reference the variable in any files (ActionScript,XML,JavaScript,HTML....) and you choose to process those files (within a contentCreation element) the variable will be replaced with whatever value you have assigned it.
To reference a variable use a dollar sign and brackets, '${}', with your variable name between the brackets.
<variables>
  <primaryGroup label="Options">
<!-- This variable is being used to determine to add Metadata or not-->
    <variable name="addMetaData" label="Add Metadata" default="true"
	  type="boolean" />
<!-- This variable is being used to setup the base class of my ActionScript file.
     In my ActionScript files'${classExtends}' will be replaced with whatever
 	 value it is assigned here -->
	<variable name="classExtends" label="Base Class:" default="Sprite"
	  type="enum('Sprite','MovieClip')" />
  </primaryGroup>
</variables>
Arguments:
- name : To reuse your variable, you'll need to be able to reference it either within the template itself, or in an external file that will be processed ( variables replaced ).
- label : What will be displayed to the users within the template GUI.
- default : The starting value for the variable.
- type : Use this to set the UI component (e.g. text input, combo box, radio button).
- description : An optional description for documentation purposes.
- enableIf : A boolean that can disable and enable the variable.
When using the type attribute here are some examples of UI components you can create:
- enum('value 1','value 2','value 3',...): This will create a combo box or radio button set of predefined values. The default for enum will be a combo box. To create radio buttons, add a style=radio attribute.
- color: This will create a button that will display a color hex value and allow you to open the color picker.
- int('minimum value','maximum value','increment value'): This will create a text input for number values based on the define range.
- float: Creates a text input for float values.
- string: A text input.
- string('value 1','value 2',...): A text input with a combo box that allows for preset (but editable) values.
- boolean: This will create a checkbox that will toggle the variable from true to false.
hyperlink
Within group elements, you can add a hyperlink which will open your browser and navigate to a particular URL.
<variables>
  <primaryGroup label="Template Options">
    <group>
      <variable name="addUnitTesting" label="Add Unit Testing"
		default="false" type="boolean" />
	  <hyperlink label="More About Unit Testing" target="http://www.flexunit.com..."
	        style="hyperlink" />
	</group>
  </primaryGroup>
</variables>
Arguments:
- label : The text that will appear for the button / hyperlink.
- description : An optional description for documentation purposes.
- enableIf : A boolean that can disable and enable the link.
- style : Use this to set the UI as a button or an HTML style link. Possible values are popupButton and hyperlink.
Global Variables
There are some global variables as well.
- selectedSDK:Use this to set a default SDK for your project. The arguments for 'sdk()' are: sdk (Flex min, Flex max, AIR min, AIR max).
Values for default can be:_selected, _highest, _lowest.
Expressions
Overview
Expressions allow you to create more variables (not associated with any UI), if/else statements, hashmaps(maps) and concatenation expressions.
There are different ways of using expressions.
Simple Assignments
<expressions>
  <expression name="sourceFolder" value="src" />
</expressions>
Arithmetic Operations
<expressions>
  <expression name="number" value="8*2"/>
</expressions>
Boolean Operations
<expressions> <!--using operator symbols such as '||' and '&&' --> <expression name="allUnitTestingSamples" value="${addExample} && ${addUnitTesting} && ${addCIExample}"/> <expression name="anyExampleChosen" value="${addExample} || ${addCIExample}"/> <!--using operator expressions such as 'or()' and 'and()' --> <expression name="allUnitTestingSamples2" value="and(${addExample}, ${addUnitTesting}, ${addCIExample}"/> <expression name="anyExampleChosen2" value="or(${addExample} ,${addCIExample})"/> </expressions>
- note: Because of how Ant works, you need to use the '&&' syntax when you want to use '&&'.
- note: Expressions 'and(value 1, value 2,...)' and 'or(value 1, value 2,...)' can accept any number of arguments.
String Operations
<expressions>
  <expression name="var" value=" wonderful "/>
  <expression name="myExp" value="concat('hello ',${var},' world')" />
  <expression name="myExp2" >hello wonderful world</expression>
<!--both output 'hello wonderful world' -->
</expressions>
- note: 'concat(value 1, value 2, value 3,...)' can accept any number of arguments.
expressions
The expressions element is used as a placeholder for your expressions. It can only appear once in your description.xml.
expression
Inside of your expressions tag you can place individual expressions and maps. An expression can be either a simple variable creation or an evaluation. Examples include:
- if('boolean','use this value if true','use this value if false')
- concat(value 1, value 2, value 3,...)
- and(value 1, value 2, ...)
- or(value 1, value 2, ...)
- true
- false
<expressions> <!-- simple variable declaration--> <expression name="sourceFolder" value="src" /> <!-- using the concat() expression--> <expression name="metaDataExp" value="concat('[SWF(backgroundColor="',0xFFFFFF, '",frameRate="',bannerFPS(${metaTheme}),'", width="', bannerWidth(${metaTheme}),'",height="',bannerHeight(${metaTheme}), '")]')" /> <!-- using an if() expression--> <expression name="htmlDesc" value="if(${htmlTemplate}, 'This HTML wrapper will create a simple HTML page with your SWF embedded in it.',' ')" /> </expressions>
map
A map (hashmap, hash table, dictionary) is a way to create a collection of key value pairs. This is helpful when creating themes or predefined sets. Whenever a particular theme or set is selected, various variables and values can be changed throughout your template.
<!-- Create a variable (a collection of 'themes') that users can select and change--> <variable name="metaTheme" label="Application Type" default="Leaderboard" type="enum('Leaderboard','Full Banner','Half Banner','Full Site')"/> <expressions> <!-- Create some maps associated with the value of 'metaTheme' --> <map name="bannerWidth" > <entry key="Leaderboard" value="'728'"/> <entry key="Full Banner" value="'468'"/> <entry key="Half Banner" value="'234'"/> <entry key="Full Site" value="'800'"/> </map> <map name="bannerHeight" > <entry key="Leaderboard" value="'90'"/> <entry key="Full Banner" value="'60'"/> <entry key="Half Banner" value="'60'"/> <entry key="Full Site" value="'600'"/> </map> <map name="bannerFPS" > <entry key="Leaderboard" value="'22'"/> <entry key="Full Banner" value="'22'"/> <entry key="Half Banner" value="'22'"/> <entry key="Full Site" value="'60'"/> </map> <!-- Use the maps and pass to them, as a key, the theme you chose. E.g if 'metaTheme' is equal to 'Leaderboard', then 'bannerFPS(${metaTheme})' is equal to 728--> <expression name="metaDataExp" value="concat('[SWF(backgroundColor="',0xFFFFFF, '",frameRate="',bannerFPS(${metaTheme}),'", width="', bannerWidth(${metaTheme}),'",height="',bannerHeight(${metaTheme}), '")]')" /> </expressions>
Global Expressions
- templateError: Use this to have the template show an error.
- sdkVersionExists: Use this to test which SDK FDT has installed. Arguments are: sdkVersionExists(MIN, MAX).
- airVersion: Returns the AIR SDK version of the supplied SDK.
- sdkVersion: Returns the Flex SDK version of the supplied SDK.
- sdkVersionExists:
- versionGreateOrEqual: Compares values
- sdkHasLib(SDK,path to SWC): Tests if the supplied SDK has a particular SWC associated with it.
Extensions
The extensions tag is used to interface with FDT plugins such as Playbook & haXe
haXe
Use this extension to add a haXe nature to your project.
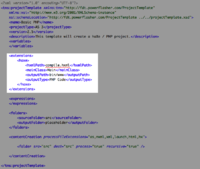
<extensions>
<haxe>
  <hxmlPath>compile.hxml</hxmlPath>
  <mainClass>${mainClassName}</mainClass>
  <outputPath>bin/swf/Main.swf</outputPath>
  <outputType>${selectedSWFVersion}</outputType>
 </haxe>
</extensions>
- hxmlPath: This is the location of haXe's configuration file. Learn more about that here.
- mainClass: This is the application entry point that will be used by default.
- outputPath: The name and location of the file(s) generated by the haXe compiler.
- outputType: Use this option to set the compilation target. Learn about them here.
Playbook
The extensions section also comes in handy when using Playbook templates. Here is a snippet from the Playbook template:
  <extensions dispensable="blackBerry">
    <blackBerry>
    <createBarDescriptor destDir="bin" if="${targetPlatform}=='BlackBerry'"/>
    <addBBTLibraries if="${addPlaybookLibraries}"/>
    </blackBerry>
    <mobile>
      <createDescriptor platform="${targetPlatform}" file="bin/${projectName}-app.xml"/>
      <setProperty platform="${targetPlatform}" name="ACTIVE" value="true"/>
      <setDescriptorProperty platform="${targetPlatform}" name="APPNAME" value= "${appName}"/>
      <setDescriptorProperty platform="${targetPlatform}" name="APPID" value= "${appId}"/>
      <setDescriptorProperty platform="${targetPlatform}" name="APPFILENAME" value= "${fileName}"/>
      <setDescriptorProperty platform="${targetPlatform}" name="APPVERSION" value= "${appVersion}"/>
     </mobile>
  </extensions>
- createBarDescriptor: Use this to have FDT reach into the Playbook SDK and grab the latest bar-descriptor file.
- addBBTLibraries: When true, FDT will link extra Playbook libraries to your project upon creation.
Mobile
The mobile extension enables you to define the mobile platform you wish to target. You can also use this to have FDT grab a description.xml file from the selected SDK and then replace some of the values.
- setProperty: Use this to set the platform. Values include:
- AirDesktop
- Android
- iOS
- BlackBerry
- createDescriptor: Use this to grab the descriptor.xml from the selected SDK.
- setDescriptorProperty: Once a descriptor file is generated, you can pre-populate values of it's elements. Values include:
- APPNAME
- APPID
- APPFILENAME
- APPVERSION
Folders
folders
This tag, and its descendants, is used to define properties of special folders in your project. This is where you define which folders are source folder(s), your output folder, and auto library folder(s). If the folder referenced here doesn't exist when the project is created, FDT will create it.
<folders>
	<!-- set, or create, a source folder named 'src' -->
	<sourceFolder>src</sourceFolder>
	<!-- set, or create, a source folder named 'src2' -->
	<sourceFolder>src2</sourceFolder>
	<!-- set, or create, an output folder named 'bin-debug' -->
	<outputFolder>bin-debug</outputFolder>

	<!-- set, or create, various auto library folders -->
	<autoLibFolder>libs</autoLibFolder>
	<autoLibFolder>libs2</autoLibFolder>
</folders>
sourceFolder
When your project is created, FDT will create a source folder for you.
<folders>
	<!-- set, or create, a source folder named 'src' -->
	<sourceFolder>src</sourceFolder>
</folders>
Arguments:
- if : A boolean value that determines if the folder is created.
outputFolder
When your project is created, FDT will preset your output folder for you.
<folders>
	<!-- set, or create, an output folder named 'bin-debug' -->
	<outputFolder>bin-debug</outputFolder>
</folders>
Arguments:
- if : A boolean value that determines if the folder is created.
autoLibFolder
When your project is created, FDT will create an auto library folder for you.
<folders>
	<!-- set, or create, various auto library folders -->
	<autoLibFolder>libs</autoLibFolder>
</folders>
Arguments:
- if : A boolean value that determines if the folder is created.
Libraries
Use this tag to define a particular .SWC or .ANE to be added to your class path upon template generation. Locations are relative to your project root. Of course, any .ANEs or .SWCs
- note: When using SWCs, this tag is best implemented when using linked resources; otherwise, we suggest placing your .SWCs inside of an Auto Library Folder.
<libraries>
  <swc>
    <path>gs/greensock.swc</path>
    <asDoc>http://uri</asDoc>;
    <source>libsource/flexunit</source>
  </swc>
  <ane>
    <path>libs/ArduinoConnector.ane</path>
  </ane>
</libraries>
swc
Adds a .SWC, located within your project, to your source path.
<libraries>
  <swc if="true">
	<path>gs/greensock.swc</path>
        <source>libsource/flexunit</source>
  </swc>
</libraries>
Arguments:
- if : A boolean value that determines if the .SWC is added to your project's source path.
path
The path for the file alias to exists in your project.
<libraries>
  <swc if="true">
	<path>gs/greensock.swc</path>
  </swc>
</libraries>
Linked Resources
linkedResources
If you have source code, either as .AS files or as .SWCs, located outside of your project, you can use the linkedResources tag to have FDT add it as a linked reference to your project. To make sure it is added to your source path, add a corresponding libraries or sourceFolder element.
<libraries>
  <swc if="${addGreensockLinkedReference}">
	<path>libs/greensock.swc</path>
  </swc>
</libraries>

<linkedResources>
  <linkedFile if="${addGreensockLinkedReference}">
	<path>libs/greensock.swc</path>
	<location>/Users/OSX/_dev/code/greensock-as3/greensock.swc</location>
  </linkedFile>
  <linkedFolder if="${addGreensockSourceCode}">
	<path>gs/src</path>
	<location>/Users/OSX/_dev/code/greensock-as3/src</location>
  </linkedFolder>
</linkedResources>
linkedFile
Within a linkedResources element, use this tag to add a .SWC, that is outside of your project's directory, to your project's source path.
<linkedResources>
  <linkedFile if="true">
	<path>libs/greensock.swc</path>
	<location>/Users/OSX/_dev/code/greensock-as3/greensock.swc</location>
  </linkedFile>
</linkedResources>
Arguments:
- if : A boolean value that determines if the .SWC is added to your project's source path.
linkedFolder
Within a linkedResources element, use this tag to add a source folder, that is outside of your project's directory, to your project's source path.
<linkedResources>
  <linkedFolder if="true">
	<path>gs/src</path>
	<location>/Users/OSX/_dev/code/greensock-as3/src</location>
  </linkedFolder>
</linkedResources>
Arguments:
- if : A boolean value that determines if the folder is added to your project's source path.
path
The path for the file or folder alias to reference in your project.
<linkedResources>
  <linkedFile if="true">
	<path>libs/greensock.swc</path>
	<location>/Users/OSX/_dev/code/greensock-as3/greensock.swc</location>
  </linkedFile>
  <linkedFolder if="true">
	<path>gs/src</path>
	<location>/Users/OSX/_dev/code/greensock-as3/src</location>
  </linkedFolder>
</linkedResources>
location
The absolute path where your referenced .SWC or folder exists on your system.
<linkedResources>
  <linkedFile if="true">
	<path>libs/greensock.swc</path>
	<location>/Users/OSX/_dev/code/greensock-as3/greensock.swc</location>
  </linkedFile>
  <linkedFolder if="true">
	<path>gs/src</path>
	<location>/Users/OSX/_dev/code/greensock-as3/src</location>
  </linkedFolder>
</linkedResources>
locationURI
Use this to include variables on your classpath.
<variables>
  <variable name="pathVar" label="Tweenlite SWC" default="/Users/OSX" type="string"/>
</variables>

<linkedResources>
  <linkedFile>
    <path>libs/greensock.swc</path>
    <location>${pathVar}/_dev/code/greensock-as3/greensock.swc</location>
  </linkedFile>
</linkedResources>
Content Creation
contentCreation
Us this tag to specify which files and folders to process and or include. If your template does not have the contentCreation tag, FDT will copy everything inside the project folder into your new project.
<contentCreation processFileExtensions="as,mxml,xml,launch,html" > <!-- Always --> <file src="as/Main.as" dest="src/Main.as" process="true" /> <!-- If HTML Wrapper --> <folder src="html-wrapper" dest="${outputFolder}" if="${htmlTemplate}" process="true" recursive="true" /> <!-- If Unit Testing --> <file src="unitTesting/flexUnitTasks-4.0.0.jar" dest="script/flexUnitTasks-4.0.0.jar" if="${addJar} && ${addUnitTesting}" /> <file src="as/TestRunner.as" dest="${testFolderName}/TestRunner.as" if="${addExample} && ${addUnitTesting}" process="true" /> <file src="as/SimpleTest.as" dest="${testFolderName}/test/SimpleTest.as" if="${addExample} && ${addUnitTesting}" /> <folder src="unitTesting/swc" dest="libs" recursive="true" if="${addUnitTesting}" /> <folder src="${testFolderName}" recursive="true" if="${addUnitTesting}" /> </contentCreation>
Arguments:
- processFileExtensions : Add which files types (extensions) you want to be processed.
file
Within the contentCreatation tag is another nested tag file. Use this tag to evaluate whether FDT includes/excludes or processes a file.
<contentCreation processFileExtensions="as,mxml">
	<file src="as/Main.as" dest="src/MyMain.as" process="true" />
</contentCreation>
Arguments:
- src : The location of the file to be accessed & copied (relative to your 'project' folder).
- dest : The location of the file that will be outputted into your project.
- process : A boolean value whether to have FDT scan the file and replace any variables.
- if : A boolean value whether to have FDT to process or copy your file at all.
folder
Also within the contentCreation tag, the folder tag is used to copy an entire directory's contents into your project. It works much like the file tag, but is for folders and their contents.
<contentCreation processFileExtensions="as,mxml">
	<folder src="unitTesting/swc" dest="libs" recursive="true"
		if="${addUnitTesting}" />
</contentCreation>
Arguments:
- src : The location of the folder whose contents will be copied and possibly processed (variables replaced).
- dest : The destination folder where the contents will be placed.
- process : A boolean value whether to have FDT scan the folder's contents and replace any variables.
- if : A boolean value whether to have FDT to evaluate this folder and it's contents at all.
- recursive: A boolean value whether FDT should include and process sub folders.
Global Variables
${projectName}
If you use this variable anywhere in your description.xml or your processed files, it will be replaced with the name of your project.
<description>
This template will create a project named '${projectName}' which contains only the basic
libraries to develop and compile a pure AS3 project.
</description>
${newline}
When working with strings, you can use the ${newline} variable to create a line break.
<description>
This template will create a project named '${projectName}' which contains only the basic
libraries to develop and compile a pure AS3 project.${newline}${htmlDesc}
</description>
Misc
antCall
Executes an ant script upon template creation.
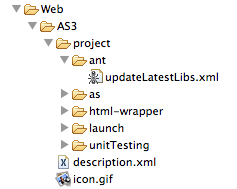
<antCall antFile="project/ant/updateLatestLibs.xml"/>
Arguments:
- antFile : The location of the file to open. This file should be located inside of your 'project' folder within your template template.
- note: While other references to project files are relative to your project folder (e.g. using the file tag to process a particular file) this task is relative to the template folder itself. Notice in the example that that project is in the file path.
Refresh Button
When using an external editor (e.g. Textmate or Notepad ) to edit your description.xml, it is helpful to have FDT rescan your description.xml for any changes. This is where the 'Refresh' button comes into play.
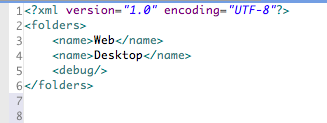
To add the refresh button, add a <debug/> tag to your order.xml file.
Tutorial
You can find here the FDT Project Template Tutorial


